Saturday, May 18, 2013

Why Leopard Geckos are Awesome

There are many reasons why leopard geckos are awesome. They are a gecko with moveable eyelids yet still sometimes lick their eyeballs anyway. They are a hardy species. They stay small (average around 8" in length). They are also easy to take care of. I would definitely list this reptile as a good beginner pet. A single gecko can live in a 20 gallon tank with a lid. They mostly just need some places to hide. Like all reptiles, they require a temperature gradient in the tank. This means that one side of the tank has to be warm, another cooler. I achieve this by using a small heat pad underneath the tank. If it is really cold, I have a heat bulb that emits a blue light.

This is a good setup example:

Notice that this person uses paper towels as the "substrate." I highly recommend this to avoid impaction. I know it doesn't look as pretty, but it makes it safer. If you feel like you have to use a sand, I recommend teaching your leo to be tong fed directly and never let food hit the ground or hang out in a tank.

This is my current tank set up. I use advertisement flyers that are non-glossy.

Another important piece to gecko welfare is a moisture box. This is often missed in novice gecko care. Typically every month, a gecko sheds its skin much like most reptiles. In order to have a proper shed, the gecko must be hydrated. To assist in their shedding in a non-invasive way, a moisture box should be created for them. The majority of gecko owners make their own since a really good one doesn't exist yet in the market. Basically, buy a plastic storage container that is big enough for your leo to lay in. Cut a hole on one side and make sure to soften the edges. Then, put moss in it. It is important to make sure it stays moist. I leave a small spray bottle by his tank and spray it down every day.

Another cool thing about geckos is what and how they eat. They are insectivores and should be given gut-loaded worms, crickets, etc. This is where we typically lose people in the pet department. Most people don't like the idea of having live worms or crickets in their homes. If you want a reptile, as I mentioned before, it is necessary. I don't even find it abnormal that I have multiple worm containers hanging out with my milk carton. (Many worms need to be refrigerated.)

The best part of owning a gecko is watching them eat. My boy Helix really gets into it. He reminds me of Jurassic Park when Alan says the T-rex's vision is based on movement. It seems that way for our gecko! Take a look at this video:

Regardless of what I say, always do your homework before taking home any reptile. Be sure to understand the reptile's needs for its entire life. Also, it is best to have everything set up ahead of time before getting a new pet. If you've ever had to move into an apartment without furniture so you had to sleep on a pile of clothes on a wooden floor, you'd understand why.

Sunday, May 12, 2013

Live Food Care: Part 1: Crickets

If you own a reptile, it is almost inevitable that you will deal with live food. Not always: if you have an herbivore or you feed frozen mice, then you are certainly in the clear. However, many reptiles out there are insectivores. I own three reptiles that require insects for their diet. Helix is ALL insects while the turtles also have pellets and greens. I could give some to Salinger for her protein source, but I prefer to use dry cat food instead (maybe I should also write a blog on tortoise protein nutrition options since there is a misconception that ALL tortoises are strictly herbivores). But for now, this post is on crickets. How to care for them and how to set them up.

First, you would need a cricket keeper. You can either purchase one from a store, like so:


This is the smaller one. There is also a larger keeper available.

Or, if you're like me and want to go do it yourself, you can also make one fairly simply. Buy a large tupperware/food storage container. Use an awl to cut small holes on the top for air flow. Wah-la!

Next, purchase two small food dishes. There are some at the pet store for a dollar each. You will need these for food and "water."

For the food dish, use the cricket chow you can find at a pet store. For the water dish, I recommend soaking 2 (or more, depending on how many crickets you plan to keep) baby carrots for a couple of seconds under water. Then, chop them on into about 4-5 pieces. This is how I personally like to give them nutrients and water. There is a product called Cricket Quencher that many people use instead of the carrots. I find that more crickets drown in this than the carrots. It is a personal preference. You can certainly use the Quencher if that suits your needs better. So the two bowls should look like this:

The last thing you will need is egg carton. You can either ask the pet store to give you some (they often ask you) or you can save your own egg cartons and cut them into smaller pieces. I do both. I recommend buying crickets from the actually store, not the cricket to go containers. They often have a shorter shelf life. It is also cheaper to get crickets from the stock batch. We found out we have a better success rate of survival with Petsmart crickets over other pet stores. They take really good care of their crickets, and they already have them "gut-loaded" so you don't have to wait to feed your pet.

And then mix it all together!

1. Container 2. Dishes 3. Food 4. Water/Carrots 5. Egg carton 6. Crickets

Make sure to store them in a dry place. Temperatures should be around 75 to 85 degrees or so. I tend to tell people to buy only a week's worth supply at most. Crickets have a short life span. Feed them to your reptile using feeder tongs. Crickets make an excellent food source than other insects so it is worth it to take care of them so that they take care of your pet!

Tuesday, May 7, 2013

Salinger knocks her water bowl over

Salinger does this almost every day. She puts one foot in and knocks it over. Some things even I can't explain for reptile behavior.

Monday, May 6, 2013

Feeding Turtles

To minimize debris in turtle tanks, we have Franklin and Little Foot eat pellets in travel tanks. It helps us monitor their food intake and makes for a cleaner tank in the end. With this, rinsing out filters, and scooping out feces daily, your tank cleanings will only be every 2 or 3 weeks.

Sunday, May 5, 2013

Fix a Feral Cat Clinic

The Animal Rescue League of Boston occasional hosts "Fix a Feral Clinics." It is a spay/neuter and vaccination clinic for feral cats (cats who are under socialized and afraid of humans --typically in an aggressive way). These are cats that are unsafe for the domestic life. Therefore, it is best to sterilize them and send them back out so that they do not create more lives for their "colonies." It has always appeared to me that ARL believes in letting the colonies die out instead of euthanizing them which is highly debatable among animal groups (see the wiki article on the subject matter). I personally think it is the most humane option. Outdoor cat life spans are typically no more than 10 years. However, one cat trapper did bring in two cats to be euthanized that she was feeding for 12 years. Usually these colonies have someone watching over them. We call them feeders. Due to their safety, they don't typically handle them outright but may leave food or monitor how they look. If the cat is in pain or very ill, they come to us to end their suffering. Despite many clinics like this in the past, there are still lots of cats out there that need to be sterilized. Today alone, I believe we may have neutered/spayed around 65 cats. Luckily, we did find a couple of cats that were already spayed/neutered. In this case, they were vaccinated and set to go. For vaccines, they get the rabies vaccine and a feline viruses vaccine.

Here are the steps:
1. Catch ferals and bring to clinic
2. Anesthetize cats one by one
3. Once cat is "under," get a basic exam from a vet (note any medical concerns to report to feeder)
4. Prep for surgery (which is what I did and will go more in-depth later about)
5. Neuter or Spay by highly qualified vets
6. Post Op - Receive feline viruses vaccine
7. Recovery (back in trap and monitored)
8. Trappers pick up cats or they stay overnight or they are set up in the shelter!

Sometimes cats that are trapped aren't so feral after all. They may have been someone's pet at one time. It may even have a microchip! In those instances, the cat may be set up in the shelter. Most often, the cats stay overnight for recovery or are taken away by their trappers for monitoring. Recovery can be tricky. After a procedure like this, they have a hard time keeping their bodies warm. Some of the cats were under heat lights or given warm pads if they were cold. Every cat is different on how they handle surgeries, just like humans.

ARL has all these steps down in a circuit around the medical side of our building. It is very efficient and makes sense. After steps 1-3 occur, the cat was handed off to one of four people in the prep for surgery stations. We were in pairs. I was fortunate to be paired up with Jessica, our very knowledgeable vet technician. She showed me how to prep cats for surgery since it was my first time. Our job was to ear tip the cats, express their bladders (or emptying their bladders), shaving the area that will have surgery, and cleaning the area. Once this was done, we brought them straight to the surgery area. It may sound easy but some occasional hiccups may arise. For instance, one female I was shaving and cleaning started having contractions throughout her body. Jessica realized right away she was going to throw up so we unstrapped her from her spay board, and Jessica tipped her face down to the garbage can so she wouldn't aspirate (when food or objects block airways.) Sometimes we may notice a cat starting to wake up a little. This meant the cat needed an additional injection before going to surgery. We were always checking for breathing and heart rate. Just as it can be dangerous for humans to be "put under," so it can be for cats as well.

It was a very rewarding experience. As my manager says, "it is instant gratification." You get the satisfaction that 60+ cats will not continue to reproduce in the wild just by what we did today. They also received some medical treatment they may not have had a chance to receive otherwise.

After my duties, I did snap a couple of shots while helping some of our team with recovery. Pictures below:

Kitten waking up


Many cats in traps


One cat a little more alert

When I arrived at my home today and took a look at Hermes, I was immediately thankful he was given a better life. I was thankful he didn't end up a feral cat. I couldn't even imagine it.

Friday, May 3, 2013

Brushing Hermes Teeth

During Hermes' annual exam last June, we found out that he had mild gingivitis. Like any fanatic cat mom, I wanted to do whatever it took to make sure his teeth didn't get any worse. My vet recommended dry food for dental health and brushing my cats teeth. I was a bit shocked to find out that people actually do this. It has been almost a year, and Hermes gets his pearly whites brushed about 4x a week (though some vets recommend every day). He is also on T/D Science Diet for cats.

You don't get a cat to brush overnight. It takes a proper introduction. The best cat toothpaste I have seen thus far is this one:

Something chicken flavored is your best bet. Hermes took to this one really well. I started out just introducing the toothpaste to see if he liked it. I let him lick it off my finger. After that, I introduced him to the brush. I let him come up to it and investigate.

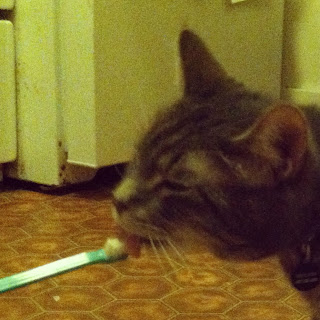
He then starts to lick at it. If I don't move the brush a little, he will mostly lick the toothpaste right off without actually brushing. However, I can usually gently coax him into chomping down on the toothbrush. While he chomps, I guide the brush around his mouth.

Once he has had enough, I give him a treat of licking it clean. I then throughly rinse the brush before putting it away.

Dental health is very underrated and often overlooked. Dental disease left untreated can lead to serious health concerns like tooth loss to bacterial infections. If teeth are not properly cared for, it can lead to expensive dental procedures since cats would need to be sedated for teeth cleaning and extractions. It is cheaper and safer to do preventatives!

It doesn't have to be all work and no play! There are toys dedicated to dental health as well. Hermes has these ones:

Here are some signs to watch out for. If you notice any of these, contact your vet!

-Dark red line along the gums
-Red and swollen gums
-Ulcers on gums or tongue
-Loose teeth
-Pus
-Difficulty chewing food
-Excessive drooling
-Excessive pawing at the mouth area

But, if you own reptiles, fish, birds, or amphibians, you don't have to worry about any of this. :)